1. Overview
Simply put, Apache Tomcat is a web server and servlet container that is used to deploy and serve Java web applications.
In this quick article, we’re going to show how to install Tomcat, how to configure a user for the Tomcat Manager
2. Install Tomcat on Windows
2.1. Download and Prepare
First, we need to download Tomcat.
Download the server as a zip file for Windows:
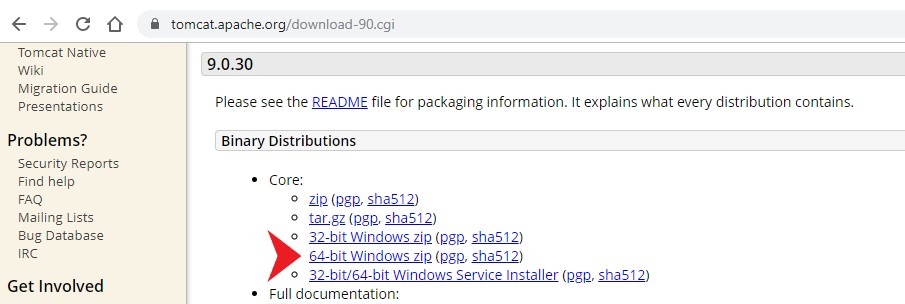
Next, we’ll simply uncompress Tomcat into its directory.
2.2. Install
On Windows, quick additional installation is necessary. Open the Windows terminal and from the Tomcat installation bin directory:
C:\apache-tomcat-9.0.30
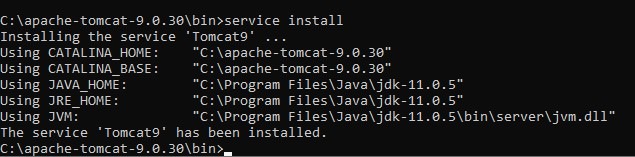
Install the service with the following command:
C:\apache-tomcat-9.0.30\bin>service install
The output should be similar to this:
2.3. Start the Tomcat Service
Start the service with the following command:
C:\apache-tomcat-9.0.30\bin>startup.bat
You should get the following output:

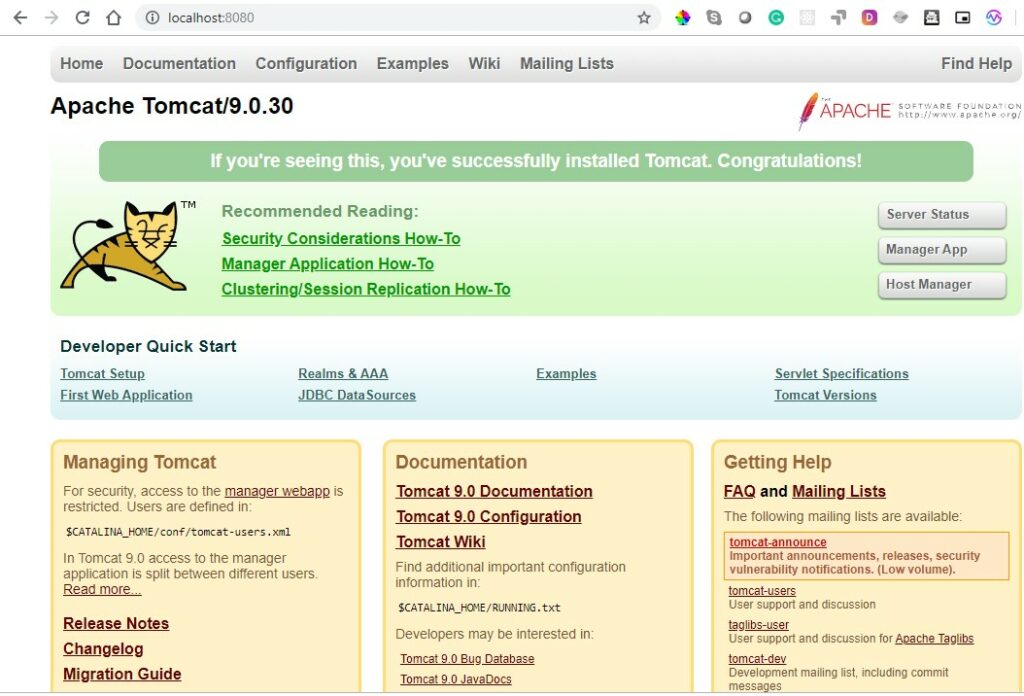
Open the browser in the URL:
And you should see the Tomcat welcome screen.
3. Tomcat Manager
To access the Tomcat manager, we need to create a user with the privileges to do that.
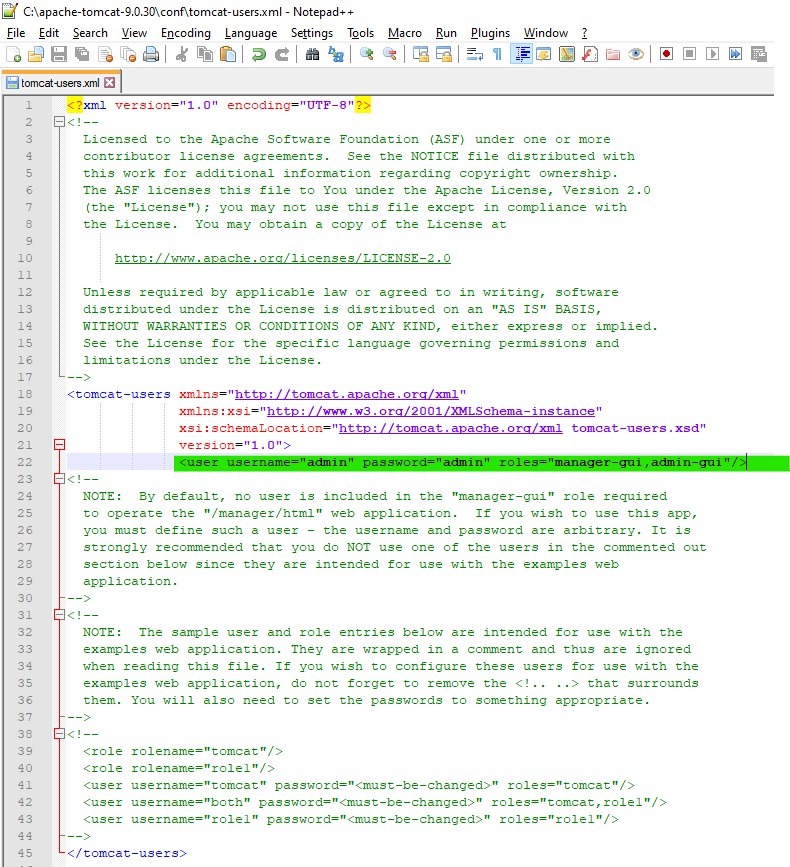
C:\apache-tomcat-9.0.30\conf\tomcat-users.xml
In this file, we are going to define the users to access the tomcat manager.
<?xml version="1.0" encoding="UTF-8"?>

<tomcat-users xmlns="http://tomcat.apache.org/xml"
              xmlns:xsi="http://www.w3.org/2001/XMLSchema-instance"
              xsi:schemaLocation="http://tomcat.apache.org/xml tomcat-users.xsd"
              version="1.0">
			  <user username="admin" password="admin" roles="manager-gui,admin-gui"/>
</tomcat-users>
In the <user> tag, we are defining a user “admin” with the password “admin” with the roles manager-gui and admin-gui.
Now restart the server and open again the URL:
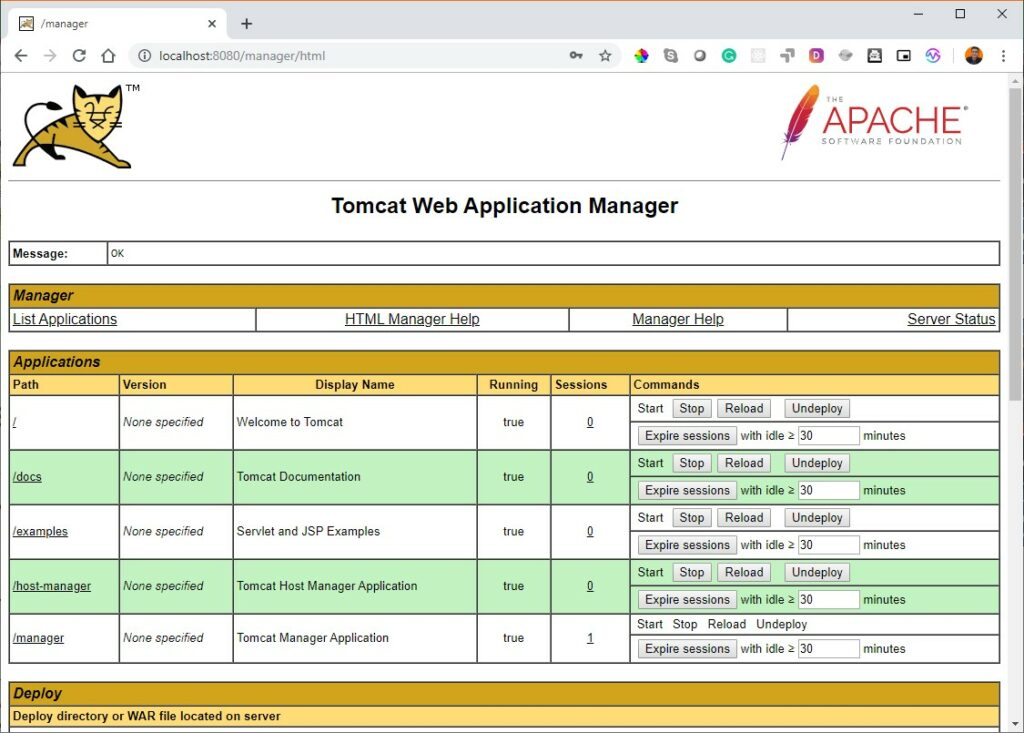
This time click on the “Manager App” button and the server will ask for credentials. After you enter the provided credentials, you should see the following screen:
4. Conclusion
At this end of this quick tutorial, we now have a working Tomcat in Windows to use during development.
To use Tomcat in production, we, of course, need to configure and tune the server accordingly.

Pingback: Configure Jetty Server in Spring Boot - Daily Code Buffer