1. Overview

Spring Boot includes an embedded Tomcat server which makes it easy to run web applications. The application code, libraries, and embedded Tomcat server are packaged in an executable JAR that can be run from the command-line without any additional server setup.
However, the embedded Tomcat server is not suitable for every environment. There may be a standalone Tomcat server that should be used instead.
In this article, we’ll cover how to deploy a Spring boot application WAR to a standalone Tomcat instance.
2. Setting up a Spring Boot Application
We’re going to setup a simple Spring Boot web application using one of the available starter templates:
<parent>
		<groupId>org.springframework.boot</groupId>
		<artifactId>spring-boot-starter-parent</artifactId>
		<version>2.2.2.RELEASE</version>
		<relativePath/> <!-- lookup parent from repository -->
</parent>
...

<dependencies>
		<dependency>
			<groupId>org.springframework.boot</groupId>
			<artifactId>spring-boot-starter-web</artifactId>
		</dependency>
</dependencies>
There’s no need for additional configurations beyond the standard @SpringBootApplication since Spring Boot takes care of the default setup.
We add a simple REST EndPoint to return some valid content for us:
2.1 Disable the embedded Tomcat in Spring Boot
We need to tell Spring Boot to not use its embedded Tomcat as the servlet container for the application.
Maven
Add the following dependency to pom.xml:
<dependency>
    <groupId>org.springframework.boot</groupId>
      <artifactId>spring-boot-starter-tomcat</artifactId>
      <scope>provided</scope>
</dependency>
2.2 Change the package type to WAR
Now, let’s change the package type from JAR to WAR
Change the packaging property in pom.xml:
<packaging>war</packaging>
Now, let’s modify the final WAR file name to avoid including version numbers:
<build>
    <finalName>${artifactId}</finalName>
    ...
</build>
2.3 Create a class that extends SpringBootServletInitializer
We will create a class ServletInitializer that will extend the class SpringBootServletInitializer for the configuration. Override the configure() method to tell the Spring Boot regarding this class as below.
This makes our application compatible with running inside a separate servlet container.
public class ServletInitializer extends SpringBootServletInitializer {

	@Override
	protected SpringApplicationBuilder configure(SpringApplicationBuilder application) {
		return application.sources(SpringBootMavenDeployApplication.class);
	}

}
Spring Boot Main Class.
@SpringBootApplication
public class SpringBootMavenDeployApplication {

	public static void main(String[] args) {
		SpringApplication.run(SpringBootMavenDeployApplication.class, args);
	}

}
2.4 Creating a Rest Controller
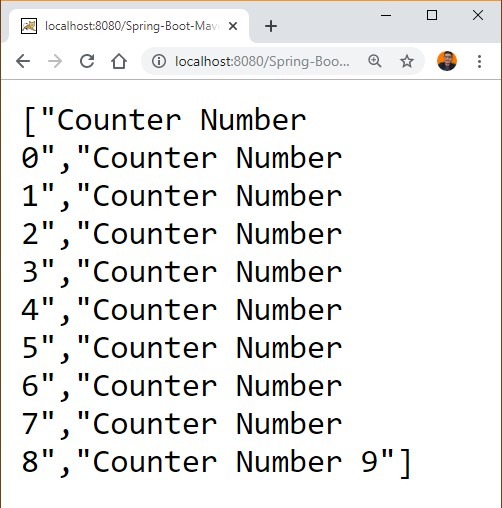
(This is an optional part) We created a Rest Controller for this example to show the data instead of the default Spring Boot White Label Error page.
@RestController
public class HomeController {

    @GetMapping("/")
    public Collection<String> sayHello() {
        return IntStream.range(0, 10)
                .mapToObj(i -> "Counter Number " + i)
                .collect(Collectors.toList());
    }
}
To build our Tomcat-deployable WAR application, we execute the mvn clean package. After that, our WAR file is generated at target/Spring-Boot-Maven-Deploy.war (assuming the Maven artifactId is “Spring-Boot-Maven-Deploy”).
We should consider that this new setup makes our Spring Boot application a non-standalone application (if you would like to have it working in standalone mode again, remove the provided scope from the tomcat dependency).
3. Deploying the WAR to Tomcat
To have our WAR file deployed and running in Tomcat, we need to complete the following steps:
- Download Apache Tomcat and unpackage it into a tomcat folder
- Copy our WAR file from target/Spring-Boot-Maven-Deploy.war to the tomcat/webapps/ folder
- From a terminal navigate to tomcat/bin folder and execute
- catalina.bat run (on Windows)
- catalina.sh run (on Unix-based systems)
- Go to http://localhost:8080/ Spring-Boot-Maven-Deploy/
This has been a quick Tomcat setup, please check the guide on Tomcat Installation for a complete setup guide.
5. Conclusion
In this short guide, we created a simple Spring Boot application and turned it into a valid WAR application deployable on a Tomcat server.
Github
As always, the full source code of the examples is available over on GitHub.